Reports and exports
Check who came in, fix a wrong row, and export the hours.
Reports and exports
Attendance lists every shift in the dates you pick: who came in, when, and how the shift counted. Export turns the same records into a file for your accountant or payroll tool.
The attendance list
Open Attendance.
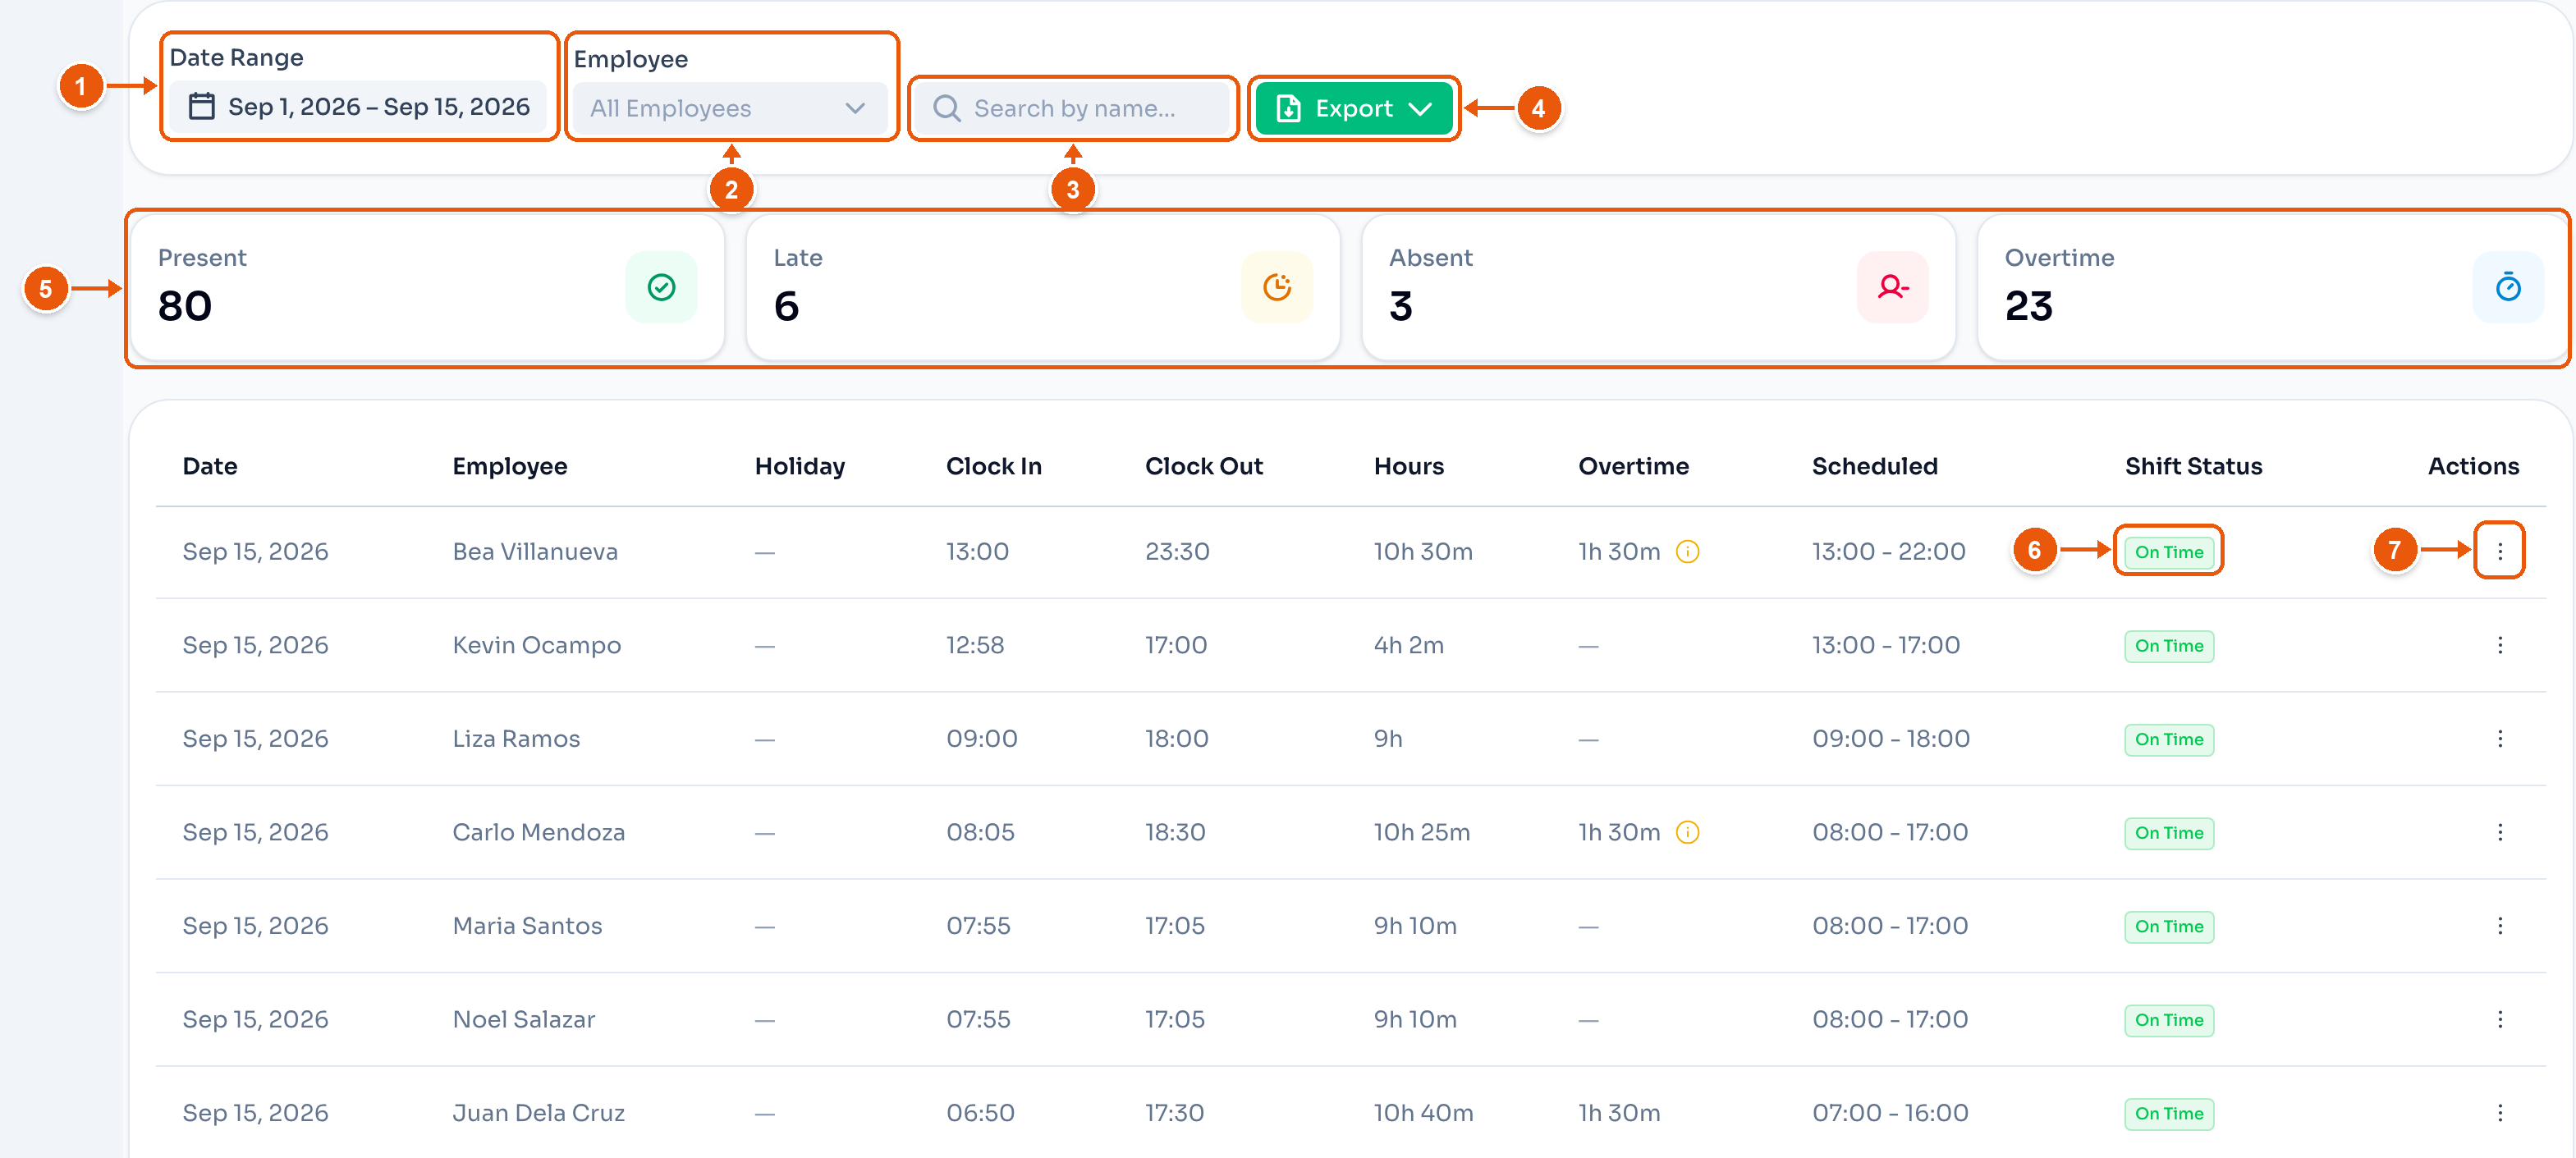
- Date Range. It opens on the last 30 days.
- Employee. One person, or everyone.
- Search by name.
- Export. See Export.
- Present, Late, Absent and Overtime count the rows. Click one to show only those rows. Click it again to show all.
- Shift Status says how the shift counted: On Time, Late, Early Out, Absent, Rest Day OT, a holiday, or a leave.
- The row's menu. See below.
Pick All Locations in the sidebar to see every location at once. A Location column is added.
Managers can open Attendance too. See Sharing a Location.
Fix a row
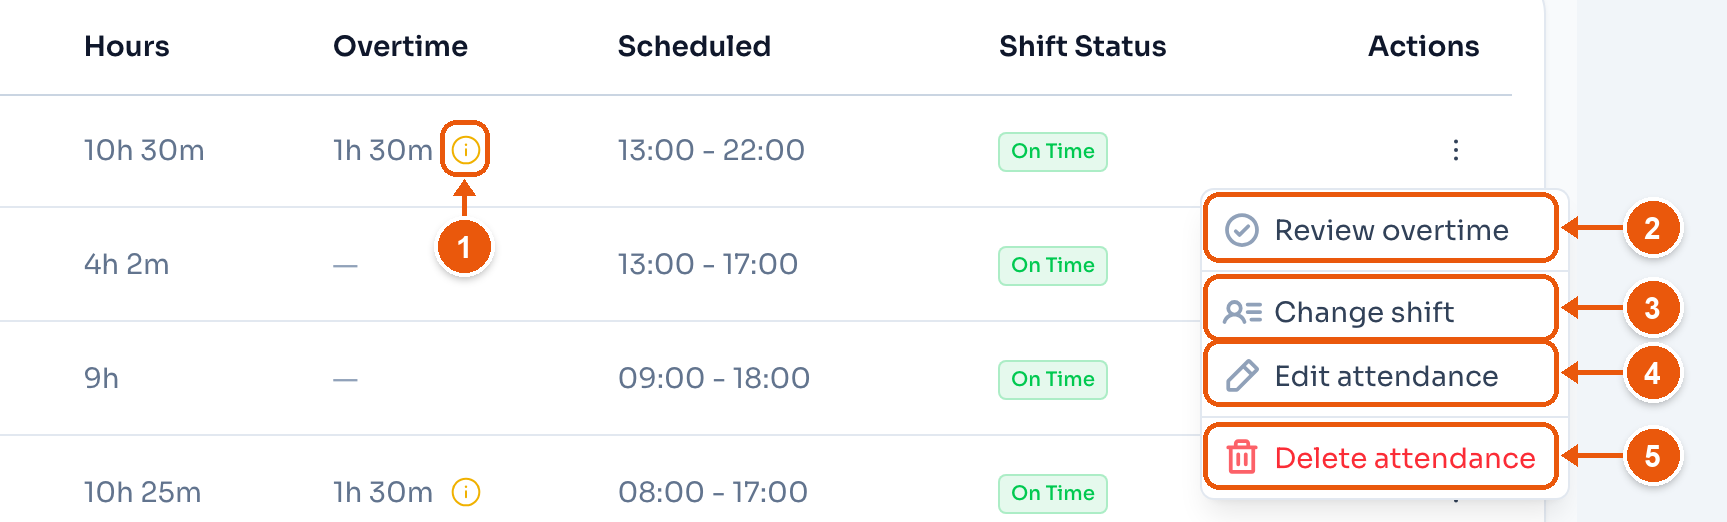
- The amber mark means this overtime is not approved yet. It is not paid.
- Review overtime opens the request so you can approve it. It shows only on rows with overtime that is not approved.
- Change shift sets the shift the employee actually worked that day. The status and overtime are counted again. When the hours look far off, the same button sits next to the menu.
- Edit attendance changes the clock-in and clock-out. On an absent row, it reads Add attendance.
- Delete attendance removes the row. You type the name and date to confirm.
Export
Click Export to download Standard Excel. For another format, click the ⋮ button beside it. The file uses the dates, the employee, and the count you picked, for the location in the sidebar. The search box does not change it.
This export has hours only, on every plan. Pay, payslips and the accountant spreadsheet are on the Payroll page, on Pro and Max.
- Standard Excel — one sheet per employee, day by day, with hour totals.
- Generic CSV — one row per employee per day, with every field.
- QuickBooks Time CSV — for a QuickBooks timesheet import. Regular and overtime hours are on separate lines.
- Sprout-compatible CSV — for a Sprout import. Each employee needs an employee code. Check the columns against your Sprout template first.
For the Payroll page's files, see Payslip and export.
The Standard Excel file
Each sheet covers the dates you picked, up to today. It has a row for every clocked shift and every scheduled day.
Holiday rows are yellow. Leave rows are violet. Rest days are blue. Absent days are red.
Columns that need a word:
- Approved Hours — the hours that count for pay, after late, undertime, approved leave and approved overtime.
- Day Type — Ordinary, Rest Day, a holiday type, or a mix such as Regular Holiday + Rest Day.
- Late (hrs) — late arrival plus undertime.
- Overtime Status — approved, pending, or rejected. Only approved overtime is paid.
- Night (hrs) and Night OT (hrs) — hours inside the night window. Set it in Payroll settings → Overtime & premiums.
Under the rows come Total Working Hours, Total Paid Leave when there is any, and Pay Categories, which groups the hours by day type. The Payroll page's file adds Pay Rate, Total Gross Pay and Pay Breakdown, which shows each pay line as hours × multiplier × rate.
If you need another format, tell us. See How do I contact support?.